Connecting to Your Coinbase Account #
This guide is an extension of the exchange configuration creation and activation guide.
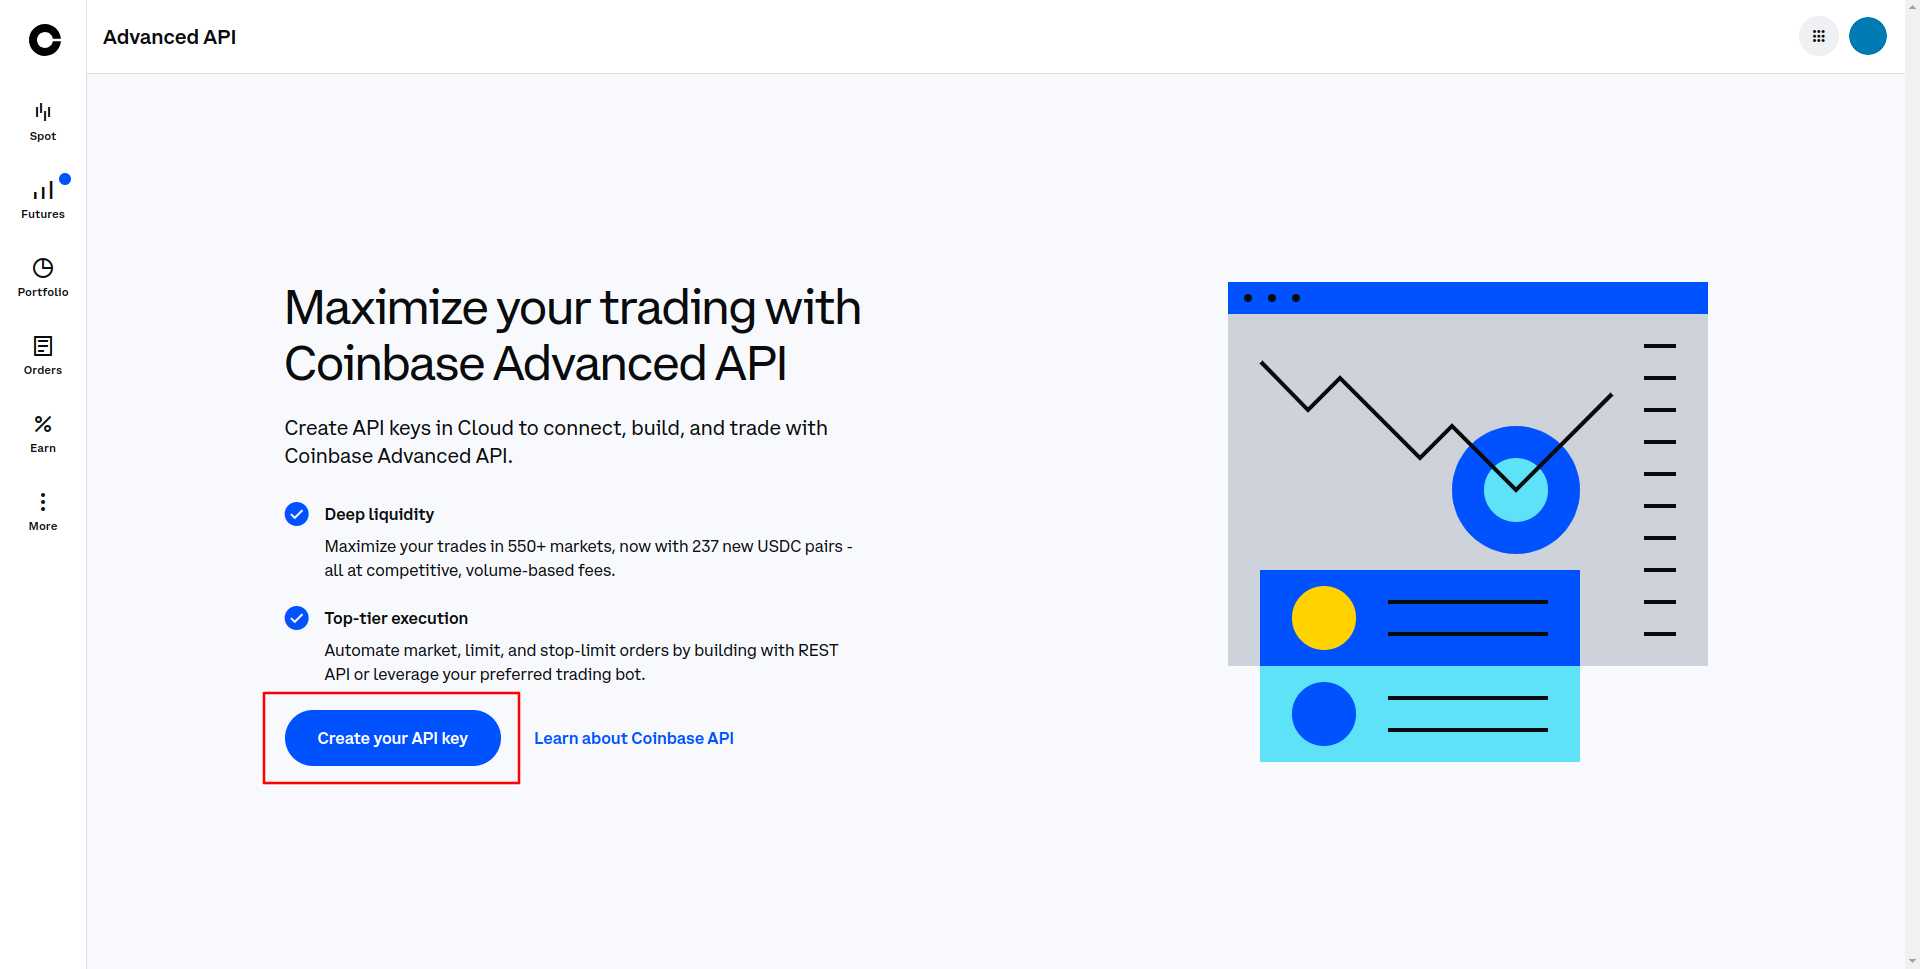
To begin connecting the Flapjack engine to your Coinbase account, you need to be logged in to your Coinbase account. Once you log in, click More on the left-side navigation bar, and then click Advanced API as shown below:

When the next page opens up, click Create your API key:
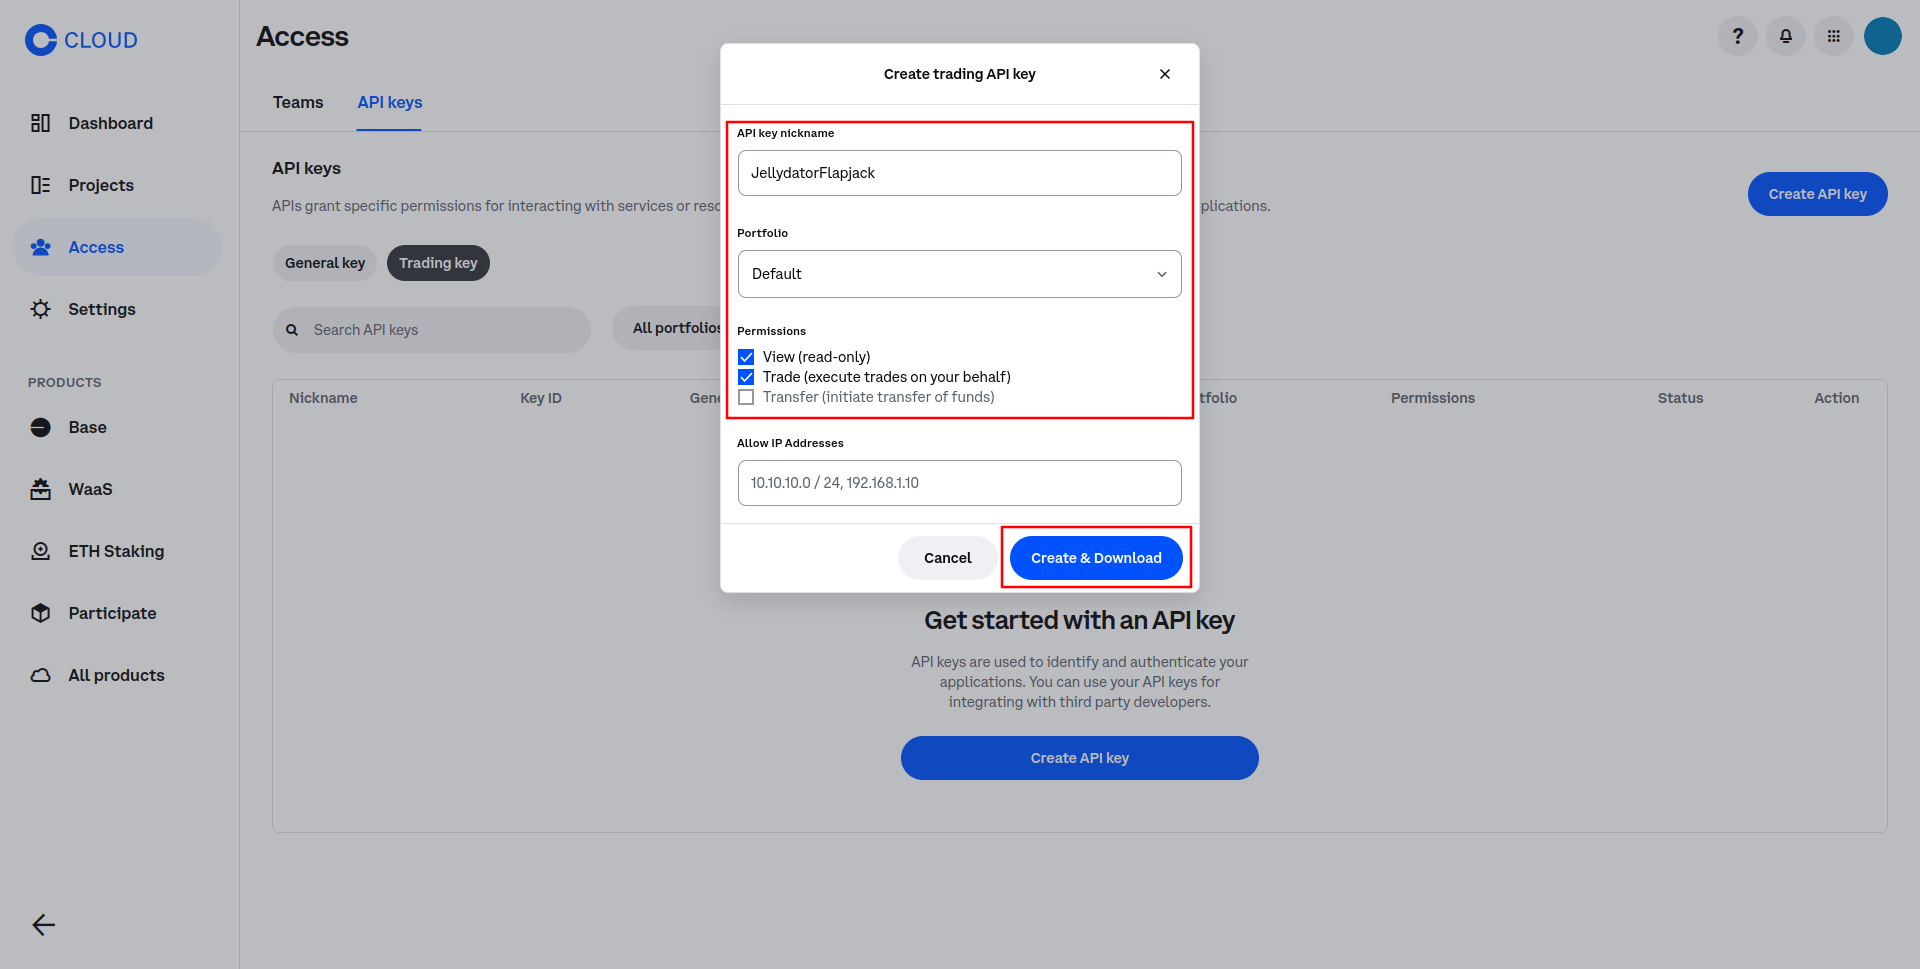
Then, you will need to enter a name of your key (something simple
like JellydatorFlapjack would suffice), select your portfolio (usually, only
Default is available), and activate View and Trade permissions.
Without these permissions Flapjack wouldn’t be able to function properly.
Finally, though this is optional, you may also specify the IP address of the
computer on which your Flapjack application is running, thus increasing the
security of your account. Once that is done, click Create & Download:
After that, you should see your API key and Private key. You might be prompted to download these keys to your computer as well, but note that this is optional and Flapjack doesn’t depend on that file in any way, which means you can cancel the download if you wish. The most important pieces of this API key record are the API key itself and the Private key with which it is associated. You can copy each of them by clicking the copy button on the right side of their boxes:
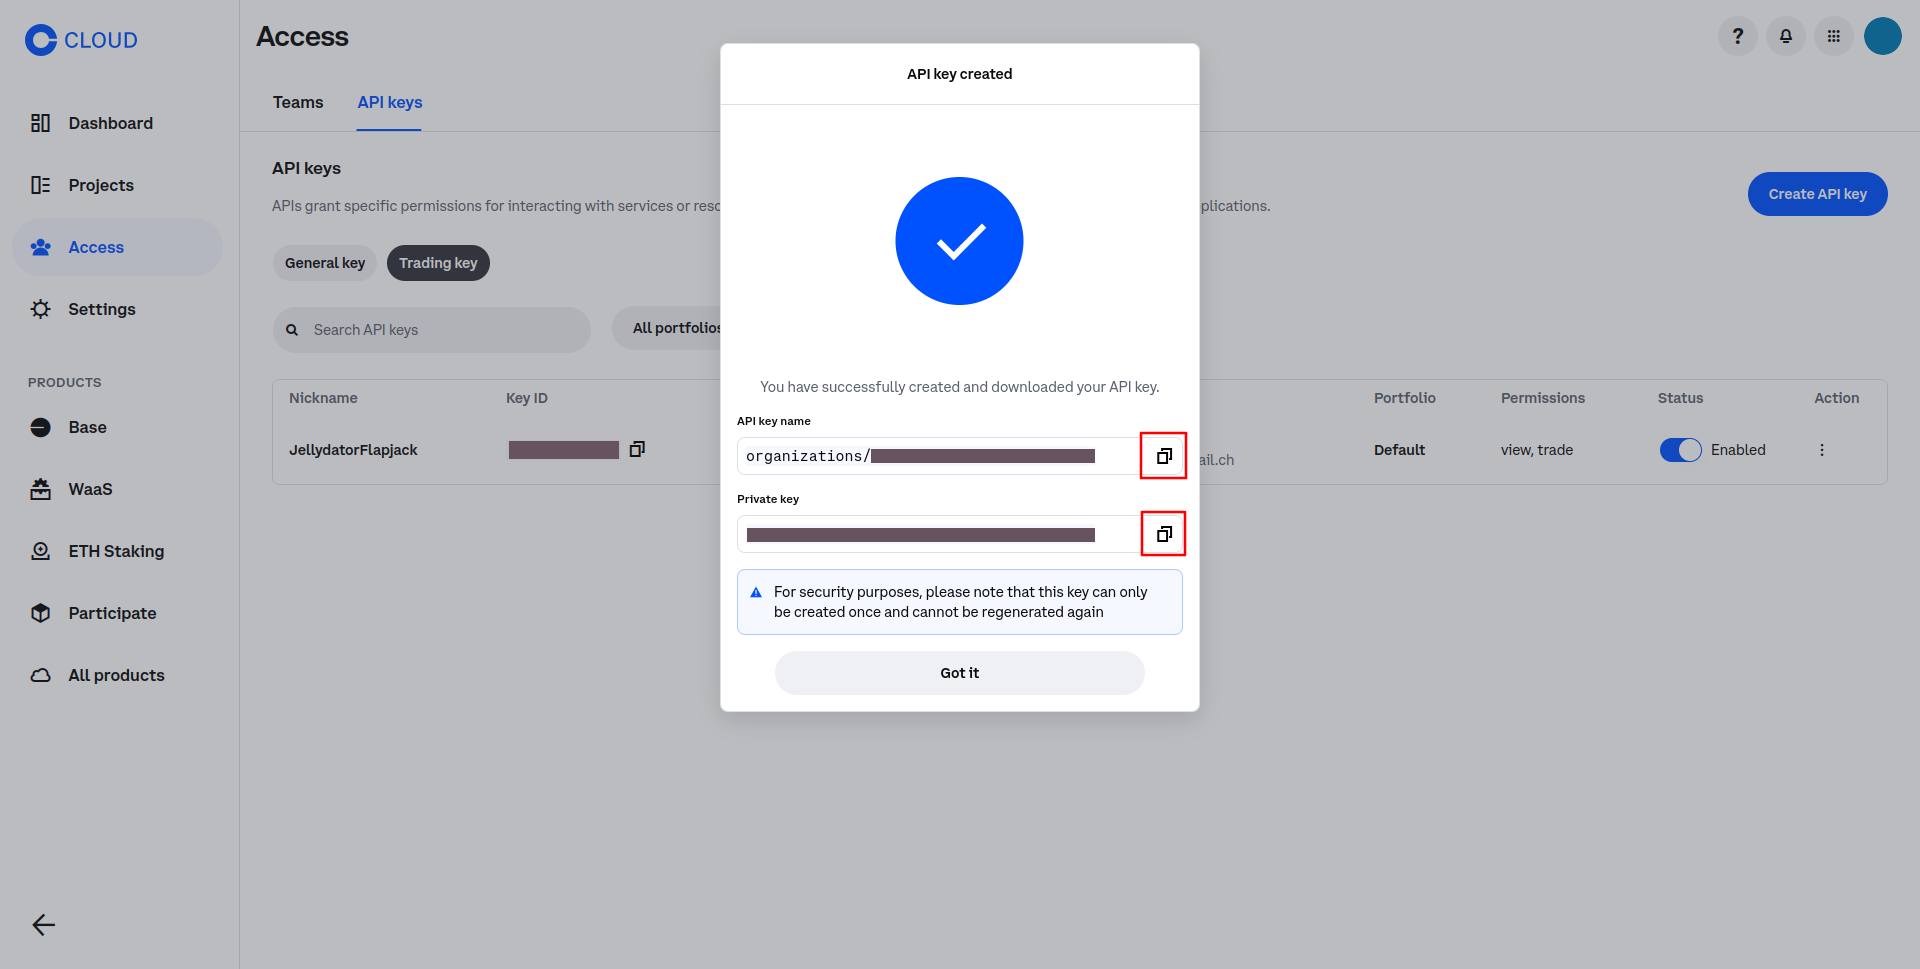
Note that the keys should be copied as is, which means they should not be formatted or modified in any way. The best way to copy them is by clicking the copy button on the right side of the key boxes.
Paste both keys to their respective input fields in the exchange configuration creation page as shown below and then click Save:
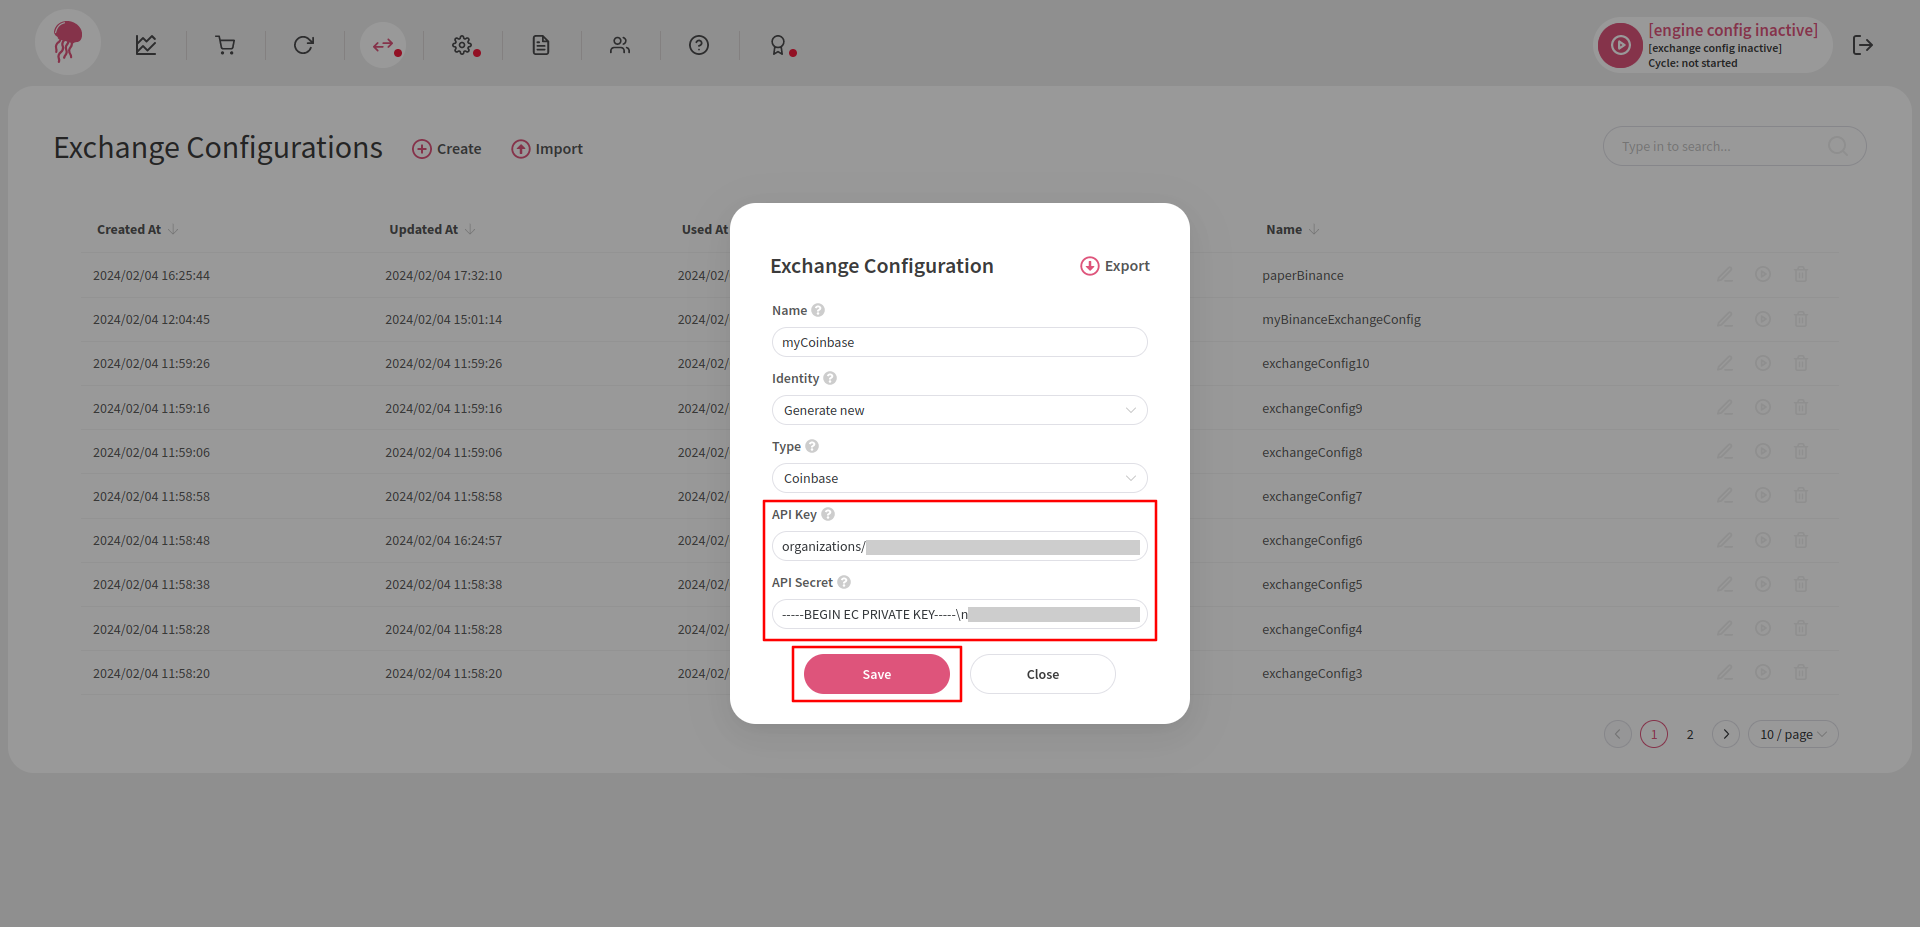
Note that the naming Flapjack and Coinbase use for these keys is slightly different; however, the values are the same. So keep in mind that:
- API Key (Flapjack) is API key name (Coinbase)
- API Secret (Flapjack) is Private key (Coinbase)